Workshop - Create Python API service with FastAPI using Poetry, Rust bindings for Python and Docker

What is this workshop about?
This tutorial will show you how to create a Python API service with FastAPI using Poetry and Rust bindings for Python and Docker.
Specifically, we will build a simple API service that will give the N-th digits of pi. The API service will be written in Python using FastAPI. The API service will use Rust bindings for Python to calculate the pi digits to make it blazingly fast. The API service will be packaged in a Docker container.
What is FastAPI?
FastAPI is a modern, fast (high-performance), web framework for building APIs with Python 3.6+ based on standard Python type hints.
What is Poetry?
Poetry is a tool for dependency management and packaging in Python. It allows you to declare the libraries your project depends on and it will manage (install/update) them for you.
What is Rust?
Rust is a multi-paradigm programming language designed for performance and safety, especially safe concurrency. Rust is syntactically similar to C++, but can guarantee memory safety by using a borrow checker to validate references. Rust achieves memory safety without garbage collection, and reference counting is optional.
Repository Structure
├── python-rust-book    # Workshop instructions and guidance in mdbook format
├── rust-pidigits       # Rust extension
├── src                 # Python code
│   ├── pi_api
├── .dockerignore       # Docker ignore file
├── docker-compose.yml  # Docker compose file
├── Dockerfile          # Common code shared between the API and the front-end
├── poetry.lock         # Poetry lock file
├── pyproject.toml      # Poetry project file
├── start.bash          # Bash script to start the API service
└── README.md           # Workshop instructions and guidance
Prerequisites
Install Python 3.10+
In this workshop we will use Python 3.12 but any Python 3.10+ version should work.
A good way to install Python 3.10+ is to use pyenv
curl https://pyenv.run | bash
Note: you may need to add the following to your .bashrc or .zshrc:
echo 'export PYENV_ROOT="$HOME/.pyenv"' >> ~/.bashrc
echo 'command -v pyenv >/dev/null || export PATH="$PYENV_ROOT/bin:$PATH"' >> ~/.bashrc
echo 'eval "$(pyenv init -)"' >> ~/.bashrc
To verify that pyenv is installed, run:
pyenv --version
Install Poetry
curl -sSL https://install.python-poetry.org | python3 -
To verify that Poetry is installed, run:
poetry --version
Install Rust
curl --proto '=https' --tlsv1.2 -sSf https://sh.rustup.rs | sh
Note: you may need to add the following to your .bashrc or .zshrc:
export PATH="$HOME/.cargo/bin:$PATH"
To verify that Rust is installed, run:
rustc .-vV
Install Docker
Visual Studio Code
You can use whatever IDE you want but we're going to use Visual Studio Code as our code editor.
The following extensions are recommended:
Python
Rust
Docker
Other
Project Setup
Now that we have all the prerequisites installed, we can start setting up our project. First we will create a new project with Poetry and then we will add FastAPI as a dependency. We will also add a few other dependencies that we will need later on. Finally, we will create a new Dockerfile to package our API service in a Docker container. We will also create a docker-compose.yml file to run our API service and a few other services in Docker containers.
Create a new project with Poetry
We will start by creating a new project with Poetry. We will call our project pi-api.
poetry new --src pi-api
This will create a new project called pi-api with the following structure:
├── pi-api
   ├── src
   │   └── pi_api
   │       └── __init__.py
   ├── tests
   │   ├── __init__.py
   ├── pyproject.toml
   └── README.md
You can read more about Poetry's new command here.
Initiate a git repository:
git init
Finally add .gitignore file to the root of the project:
touch .gitignore
Install Python using pyenv
We will use pyenv to install latest Python version 3.12 You can check which versions are available with:
pyenv install --list #this will output all the versions available
pyenv install --list | grep 3.12

To actually install Python 3.12, run:
pyenv install 3.12.0
Once the installation is complete, you can set project specific Python version with:
pyenv local 3.12.0
Try to run python --version and you should see the following output:
Python 3.12.0
This command creates a .python-version file in your current directory. If you have pyenv active in your environment, this file will automatically activate this version for you.
By default, pyenv does not enable profile-guided optimization (PGO) and link-time optimization (LTO) when building the interpreter. If you want to get the maximum performance out of your Python code, you should enable the --enable-optimizations flag. This will result in a faster interpreter at the cost of significantly longer build times.
See more detail info here
Create a new virtual environment
We will create a new virtual environment for our project with Poetry. Poetry doesn’t create a virtual environment right away when you start a project. You can tell Poetry explicitly which Python version you want to use for it and go from there:
poetry env use 3.12.0
For me this will print out the following:
Creating virtualenv pi-api-MilAWA87-py3.12 in /home/mikko/.cache/pypoetry/virtualenvs
Using virtualenv: /home/mikko/.cache/pypoetry/virtualenvs/pi-api-MilAWA87-py3.12
To verify that the virtual environment is created, run:
poetry env list
It should output something like this:
pi-api-MilAWA87-py3.12 (Activated)
Add Python dependencies
Poetry add
We will add the following dependencies to our project:
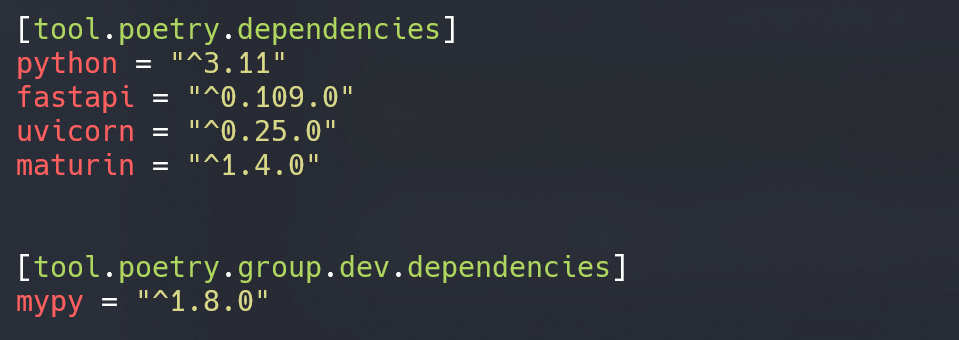
poetry add fastapi uvicorn maturin
When you run the poetry add command, Poetry automatically updates pyproject.toml (tool.poetry.dependencies) and pins the resolved versions in the poetry.lock file.
If you like to add a development dependency, you can use the --dev flag:
poetry add --group dev mypy
This will add mypy as a development dependency to your project. Specifically, it will add mypy to the [tool.poetry.dev-dependencies] section in pyproject.toml.
Your pyproject.toml file should now have the following tables (your versions may differ):
Poetry lock
You can also manually add dependencies to the pyproject.toml file and lock them afterward. After manually adding a dependency to pyproject.toml, you can run the following command to update the lock file:
poetry lock
Note: poetry lock will also update the lock file if you have added dependencies with the poetry add command. f you don’t want to update any dependencies that are already in the poetry.lock file, then you have to add the --no-update option to the poetry lock command:
poetry lock --no-update
In this case, Poetry only resolves the new dependencies but leaves any existing dependency versions inside the poetry.lock file untouched.
While the version requirement in the pyproject.toml file can be loose, Poetry locks the versions you’re actually using in the poetry.lock file. That’s why you should commit this file if you’re using Git. By providing a poetry.lock file in a Git repository, you ensure that all developers will use identical versions of required packages. When you come across a repository that contains a poetry.lock file, it’s a good idea to use Poetry for it.
You can read more about Poetry's lock command here.
Poetry install
You can install the dependencies from the lock file with the following command:
poetry install
By running poetry install, Poetry reads the poetry.lock file and installs all dependencies that are declared in it.
You can read more about Poetry's install command here.
Poetry update
You can update the dependencies in the lock file with the following command:
poetry update
The update command will update all your packages and their dependencies within their version constraints. Afterward, Poetry will update your poetry.lock file. You can control which packages to update by specifying their names. For example, to update only the mypy package, you can run:
poetry update mypy
or to only update the packages in the tool.poetry.dependencies section, you can run:
poetry update --without dev-dependencies
You can read more about Poetry's update command here.
About pyproject.toml
The pyproject.toml file is the heart of your project. It’s a configuration file standard that was defined in PEP 518. It contains all the metadata about your project, its dependencies, and build instructions. It is meant to replace the old setup.py and requirements.txt files.
Setup Rust extension
We will now add a Rust extension to our project. We will use maturin to build the Rust extension. Maturin is a command-line tool to build and publish crates with pyo3, rust-cpython and cffi bindings as well as rust binaries as Python packages.
You can easily add a Rust extension to your project with the following command:
poetry run maturin new rust-pidigits
This will create a new Rust extension called rust-pidigits in the rust-pidigits directory. The rust-pidigits directory will contain the following files:
├── rust-pidigits
│   ├── Cargo.toml
|   ├── Cargo.lock
│   ├── pyproject.toml
│   └── src
│       └── lib.rs
We can also remove the pyproject.toml file because we will use the pyproject.toml file in the root of the project. Change build-system table in pyproject.toml to:
[build-system]
requires = ["maturin>=1.4,<2.0"]
build-backend = "maturin"
Add the following table to the pyproject.toml file to configure maturin:
[tool.maturin]
# The name of the crate
name = "rust-pidigits"
# The version of the crate
version = "0.1.0"
# The name of the Python module
module = "rust_pidigits"
# The path to the Rust source code
path = "pidigits-rust/src/lib.rs"
# The minimum Python version required to use the crate
requires-python = ">=3.11"
# The Rust features to build with
features = ["pyo3/extension-module"]
description = "Calculate pi to the Nth digit"
readme = "README.md"
license = { file = "LICENSE.txt" }
# Remove this if you don't have clang and lld installed
# You can install clang and lld with `sudo apt install clang lld`
rustc-args = [
    "-C",
    "linker=clang",
    "-C",
    "link-arg=-fuse-ld=lld",
    "-C",
    "target-cpu=native",
]
manifest-path = "rust-pidigits/Cargo.toml"
profile = "release"
strip = true
codegen-units = 1
lto = true
You can read more about maturin's configuration here
We can also add more Metadata to the pyproject.toml file: check out the specification from here
For example, we can add the following Metadata to the pyproject.toml file:
[project]
name = "pidigits"
keywords = ["pi", "pi to the nth digit"]
authors = [
    { email = "mikko.leppanen@vaisala.com" },
    { name = "Mikko Leppänen" },
]
maintainers = [
    { name = "Mikko Leppänen", email = "mikko.leppanen@vaisala.com" },
]
classifiers = [
    "Programming Language :: Python",
    "Programming Language :: Rust",
    "Development Status :: 4 - Beta",
    "License :: OSI Approved :: MIT License",
    "Operating System :: POSIX :: Linux",
    "Intended Audience :: Developers",
]
Then the final thing we need to do is to add a couple of Rust dependencies to the Cargo.toml file:
cargo add rug -F float,integer
cargo add pyo3
This will add the following dependencies to the Cargo.toml file (your versions may differ):
[dependencies]
pyo3 = "0.20.2"
rug = { version = "1.22.0", features = ["float", "integer"] }
Now we are ready to start actually writing some Python&Rust code! 🎉
Application Development
We will start by writing the Python code for our API service. We will use FastAPI to create the API service. We will also use uvicorn to run the API service. We will then write the Rust code for our API service. We will use Rust bindings for Python to calculate the pi digits. Finally, we will write a Dockerfile to package our API service in a Docker container. We will also write a docker-compose.yml file to run our API service and a few other services in Docker containers.
Rust bindings for Python
We will start by writing the Rust code for our API service. We will use pyo3 to create the Rust bindings for Python. PyO3 is a Rust binding for the Python interpreter. It provides a convenient way of extending Python with Rust. PyO3 supports all recent versions of CPython 3 as well as PyPy3.
Create file chudnovsky.rs in rust-pidigits/src directory:
#![allow(unused)]
fn main() {
use pyo3::{exceptions::PyValueError, PyResult};
use rug::{ops::Pow, Float, Integer};

// chudnovsky algorithm for calculating pi digits to the Nth digit
// (https://en.wikipedia.org/wiki/Chudnovsky_algorithm).
//
// Returns a string representation of the pi digits.
// The number of digits is determined by the digits parameter.
// The digits parameter must be greater than 0 and less than (2^32-1)/4.

fn binary_split(a: u32, b: u32) -> (Integer, Integer, Integer) {
    if b - a == 1 {
        if a == 0 {
            let pab = Integer::from(1);
            let qab = Integer::from(1);
            let rab = Integer::from(&pab * (13591409 + 545140134 * a));
            return (pab, qab, rab);
        }
        let a_bigint = Integer::from(a);
        let pab: Integer = (Integer::from(6 * &a_bigint) - 5)
            * (Integer::from(2 * &a_bigint) - 1)
            * (Integer::from(6 * &a_bigint) - 1);
        let qab = a_bigint.clone().pow(3) * 10939058860032000u64;
        let rab = &pab * (13591409 + 545140134 * a_bigint);

        if a % 2 == 0 {
            return (pab, qab, rab);
        }
        return (pab, qab, -1 * rab);
    }
    let m = (a + b) / 2;
    let (pam, qam, ram) = binary_split(a, m);
    let (pmb, qmb, rmb) = binary_split(m, b);
    let p1n = Integer::from(&pam * &pmb);
    let q1n = Integer::from(&qam * &qmb);
    let r1n = Integer::from(&ram * &qmb) + Integer::from(&pam * &rmb);
    (p1n, q1n, r1n)
}

pub fn chudnovsky(digits: u32) -> PyResult<String> {
    match digits {
        0 => return Ok("3".to_string()),
        1 => return Ok("3.1".to_string()),
        _ => {
            if digits.checked_mul(4).is_none() {
                return Err(PyValueError::new_err(
                    "Invalid digits: value must be between 0 <= x < (2^32-1)/4",
                ));
            }
        }
    }
    let used_precision = digits * 4;
    let digits_per_term = f32::log10(10939058860032000f32 / 6f32 / 2f32 / 6f32);
    let n = (digits as f32 / digits_per_term).ceil() as u32;
    let i1 = Integer::from(426880);
    let i2 = Float::with_val(used_precision, 10005);

    let (_, q1n, r1n) = binary_split(0, n);
    Ok(((i1 * i2.sqrt() * q1n) / r1n).to_string())
}
}
Next place the following code in lib.rs file in rust-pidigits/src directory:
#![allow(unused)]
fn main() {
use pyo3::prelude::*;

pub mod chudnovsky;
use chudnovsky::chudnovsky;

#[pyfunction]
fn chudnovsky_pi(py: Python, digits: u32) -> PyResult<String> {
    py.allow_threads(move || chudnovsky(digits))
}

/// A Python module implemented in Rust.
#[pymodule]
fn rust_pidigits(_py: Python, m: &PyModule) -> PyResult<()> {
    m.add_function(wrap_pyfunction!(chudnovsky_pi, m)?)?;
    Ok(())
}
}
The #[pyfunction] attribute is used to mark a function as a Python function. The #[pymodule] attribute is used to mark a module as a Python module.
You can read more about PyO3's attributes, pyfunction and pymodule.
The allow_threads temporarily releases the GIL, thus allowing other Python threads to run. If you don’t need to touch the Python interpreter for some time and have other Python threads around, this will let you run Rust-only code while letting those other Python threads make progress (allow_threads in api doc).
The PyResult type is a wrapper around Result that is used to return errors from Python functions. You can read more about PyO3's error handling here.
Now we are ready to build our Rust extension. We will use maturin to build our Rust extension. Running maturin build will produce a wheel file in the rust-pidigits/target/wheels directory. The wheel file will be named pidigits-0.1.0-cp312-cp312-manylinux_2_34_x86_64.whl (your version may differ). The wheel file contains the compiled Rust code and the Python bindings. The wheel file can be installed with pip.
A Python .whl file is essentially a ZIP (.zip) archive with a specially crafted filename that tells installers what Python versions and platforms the wheel will support.
{dist}-{version}(-{build})?-{python}-{abi}-{platform}.whl
In our case the wheel file is named pidigits-0.1.0-cp312-cp312-manylinux_2_34_x86_64.whl => pidigits is the name of the distribution, 0.1.0 is the version, cp312 is the Python version, cp312 is the ABI tag, manylinux_2_34_x86_64 is the platform tag. So this wheel file will work with Python 3.12 on Linux with AMD64 (x86-64) architecture.
The manylinux wheel tag is a platform tag that indicates that the wheel will be compatible with all versions of Linux that support the manylinux standard. The manylinux standard is a standard for Linux distributions that allows Python wheels to be shared across multiple Linux distributions. You can read more about the manylinux standard here
More info about wheel files can be found here.
By default, Python extension modules can only be used with the same Python version they were compiled against. For example, an extension module built for Python 3.5 can't be imported in Python 3.8. PEP 384 introduced the idea of the limited Python API, which would have a stable ABI enabling extension modules built with it to be used against multiple Python versions. This is also known as abi3.
Check out py03's docs about building and distribution for more info.
poetry run maturin build
If you want to build a wheel file for a specific Python version, you can use the --interpreter option:
poetry run maturin build --interpreter python3.12
If everything went well, maturin was able to build the wheel file and you should see the produced wheel file in the rust-pidigits/target/wheels directory.

Now we are ready to start writing some Python code! 🎉 Nice work! 👍
Implementing Python API service
First create a main.py file in the src/pi_api directory and add the following code to it:
import math
from typing import Annotated

from fastapi import FastAPI, HTTPException, Query
from pydantic import BaseModel
from rust_pidigits import chudnovsky_pi

app = FastAPI()


MAX_DIGITS = math.ceil((2**32 - 1) / 4)


@app.get("/pidigits/")
async def pidigits(
    digits: Annotated[int, Query(ge=0, lt=MAX_DIGITS)],
    limit: Annotated[int | None, Query(gt=0, lt=MAX_DIGITS)] = None,
) -> str:
    try:
        if limit is not None:
            return chudnovsky_pi(digits)[: limit + 2]
        return chudnovsky_pi(digits)[: digits + 2]
    except (ValueError, OverflowError) as ex:
        raise HTTPException(
            status_code=400,
            detail=str(ex),
        )


class HealthResponse(BaseModel):
    status: str


@app.get("/healthz")
async def healthz() -> HealthResponse:
    return HealthResponse(status="ok")
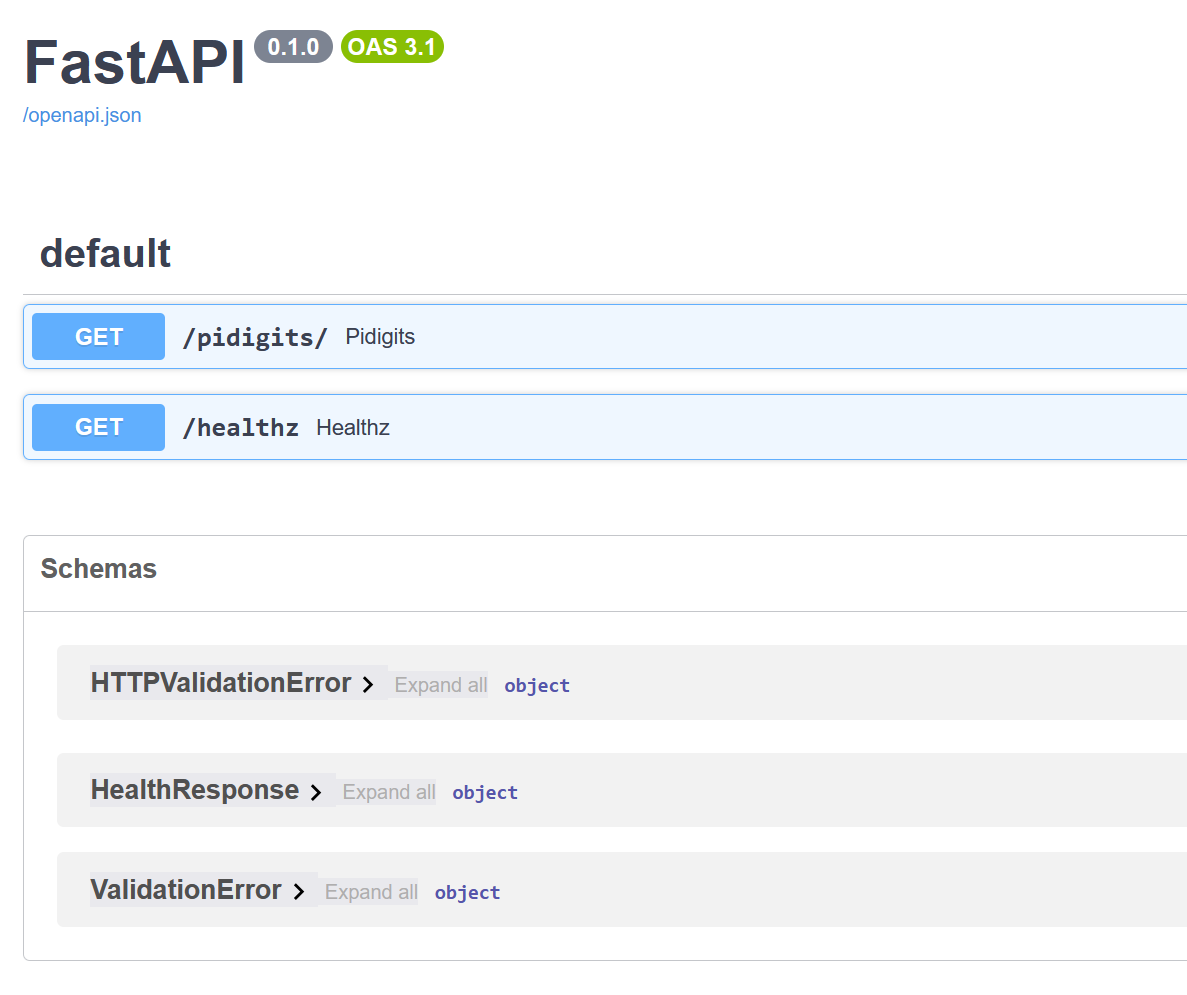
Here we are using FastAPI to create a simple API service. We have two endpoints: /pidigits/ and /healthz. The /pidigits/ endpoint takes two query parameters: digits and limit. The digits parameter is used to determine the number of pi digits to return. The limit parameter is used to limit the number of pi digits to return. The /healthz endpoint is used to check the health of the API service. The /healthz endpoint returns a simple JSON object with the status ok.
Because this is a very simple API, we have defined endpoints in the same file as the main function. In a real-world application, you would probably define the endpoints in a separate file.
Our rust extension can be imported with from pidigits_rust import chudnovsky_pi. pidigits-rust being the name of the Rust extension and chudnovsky_pi being the name of the function we want to import. You can read more about PyO3's module structure here.
Before we can run our API service, we need to install our Rust extension. We can install the wheel file directly with pip:
pip install rust-pidigits/target/wheels/pidigits-0.1.0-cp312-cp312-manylinux_2_34_x86_64.whl
or we can install the wheel file with Poetry:
poetry run pip install rust-pidigits/target/wheels/pidigits-0.1.0-cp312-cp312-manylinux_2_34_x86_64.whl
You may need to change the version number in the wheel file name. In this case the version number is 0.1.0.
Now we are ready to run our API service! 🎉
Starting the API service
We will use uvicorn to run our API service. Uvicorn is a lightning-fast ASGI server implementation, using uvloop and httptools.
You can read more about uvicorn here.
Running the following command from the project root will start the API service:
poetry run uvicorn src.pi_api.main:app --reload --host 0.0.0.0 --port 8000
This will start the API service on port 8000. You can now open your browser and go to http://localhost:8000/healthz to check the health of the API service. You can also go to http://localhost:8000/pidigits/?digits=100 to get the first 100 digits of pi. If you like limit the number of digits to 10, you can go to http://localhost:8000/pidigits/?digits=100&limit=10.
The FastAPI documentation is available at http://localhost:8000/docs. You can also try the API service with the Swagger UI at http://localhost:8000/redoc.
You can also use curl to test the API service:
Request:
curl http://localhost:8000/healthz
Output:
{"status": "ok"}
Request:
curl http://localhost:8000/pidigits/?digits=100
Output:
"3.1415926535897932384626433832795028841971693993751058209749445923078164062862089986280348253421170679"
Request:
curl http://localhost:8000/pidigits/?digits=100&limit=10
Output:
"3.1415926535"
If the API service is running, you should get the responses above.
Great! Now we are ready to package our API service in a Docker container! 🎉 Great work! 👍
Containerization
As a final step, we will package our API service in a Docker container. We will use a multi-stage build to keep the size of the final image as small as possible. The base image for the final image will be python:3.12-bookworm. We will also create a docker-compose.yml file to run our API service.
.dockerignore
Since Docker copies all files from the building folder, we will to add the .dockerignore file to the project root that contains the patterns of paths to avoid copying these files. It's useful, for example, to skip the target building folder, because it may contain large files that are not needed in the final image.
**/target/
**/Cargo.lock

.dockerignore
.git
.gitignore
.vscode
**/__pycache__
You can read more about Docker's .dockerignore file here.
Dockerfile
Create a new file called Dockerfile in the root of the project and add the following code to it:
# pull official base image
FROM python:3.11-bookworm as base

ENV PYTHONDONTWRITEBYTECODE 1
ENV PYTHONUNBUFFERED 1
ENV DEBIAN_FRONTEND=noninteractive

# install system dependencies
RUN set -eux; \
    apt update; \
    apt -y upgrade; \
    apt install --no-install-recommends wget -y; \
    pip install --no-cache-dir --upgrade pip; \
    apt autoremove -y; \
    apt clean; \
    rm -rf /var/lib/apt/lists/*;


FROM base AS python-deps

ENV PATH="${PATH}:/root/.local/bin"
ENV PATH="/root/.cargo/bin:${PATH}"

# Install poetry and rust
SHELL ["/bin/bash", "-o", "pipefail", "-c"]
RUN set -eux; \
    apt-get update; \
    apt-get install --no-install-recommends curl gcc libc6-dev clang lld -y; \
    curl -sSL https://install.python-poetry.org | python3 -; \
    curl https://sh.rustup.rs -sSf | sh -s -- -y; \
    poetry self update


# Install python dependencies in /.venv
COPY pyproject.toml poetry.lock ./
COPY ./pidigits-rust ./pidigits-rust
RUN POETRY_VIRTUALENVS_IN_PROJECT=1 poetry install
RUN poetry run maturin build -m pidigits-rust/Cargo.toml; \
    poetry add pidigits-rust/target/wheels/*.whl; \
    poetry install


FROM base AS runtime

# set work directory
WORKDIR /app

# Copy virtual env from python-deps stage
COPY --from=python-deps /.venv /.venv
ENV PATH="/.venv/bin:$PATH"

# create the app user
RUN adduser --group --system appuser; \
    chown appuser:appuser /app

# copy project
COPY src start.bash ./

# run entrypoint
USER appuser
EXPOSE 8000
ENTRYPOINT ["bash", "start.bash"]
We need one last thing before we can build our Docker image. We need to create a start.bash file in the root of the project and add the following code to it:
#!/bin/bash
uvicorn pidigits.main:app --host 0.0.0.0 --port 8000
This file will be used as the entrypoint for our Docker image. The entrypoint is the command that is executed when the container is started.
You can read more about Docker's entrypoint here.
We don't necessarily need a start.bash file. We could also use the following command as the entrypoint:
ENTRYPOINT ["uvicorn", "pidigits.main:app", "--host", "0.0.0.0", "--port", "8000"]
docker-compose.yml
Even though we can run our API service with Docker, it's not very convenient. We have to build the Docker image and then run the Docker container. We can make this process a lot easier by using docker-compose. We will create a docker-compose.yml file to run our API service.
Create a new file called docker-compose.yml in the root of the project and add the following code to it:
version: '3.8'

services:
  backend:
    build:
      context: .
      dockerfile: Dockerfile
    ports:
      - "8000:8000"
    expose:
      - 8000
    healthcheck:
      test: curl --fail backend:8000/healthz || exit 1
      interval: 30s
      retries: 5
      start_period: 20s
      timeout: 5s
    restart: unless-stopped
Now we are ready to run our API service with docker-compose! 🎉
Building and running the Docker container
docker compose up -d
If you are building the Docker image for the first time, it may take a few minutes to build the image.
This will start the API service on port 8000. You can now verify that the API service is working correctly.
This is the final step! 🎉 Great work! 👍
Poetry commands
| Command | Description |
|---|---|
poetry --version | Show the version of your Poetry installation. |
poetry self update | Update Poetry to the latest version. |
poetry new | Create a new project |
poetry init | Create a new project or convert from legacy formats |
poetry install | Install project dependencies |
poetry add | Add a new dependency |
poetry update | Update dependencies as according to the pyproject.toml file |
poetry remove | Remove a dependency |
poetry show | Show information about current project |
poetry show --outdated | Show the latest version but only for packages that are outdated |
poetry show --latest | Show the latest version. |
poetry build | Build distributable packages |
poetry publish | Publish distributable packages to PyPI |
poetry config --list | Show the Poetry configuration |
poetry search | Search for package in PyPI |
poetry run | Run a command inside the virtual environment |
poetry shell | Spawn a shell within the virtual environment |
poetry check | Check the validity of the pyproject.toml file |
poetry lock | Locks the current dependency versions |
poetry env | Interact with Poetry's project virtualenv |
poetry cache | Interact with Poetry's cache |
poetry debug | Show information useful for debugging |
poetry export | Export the lock file to alternative formats |
poetry env list | List all virtualenvs associated with the current project |
poetry env info | Displays information about the current environment. |
poetry env remove | Removes the virtualenv for the current project. |
poetry env use | Sets the virtualenv for the current project. |
Check out the full list of commands here.
maturin commands
| Command | Description |
|---|---|
maturin build | Build a Python package |
maturin develop | Build a Python package in development mode |
maturin publish | Publish a Python package to PyPI |
maturin sdist | Build a source distribution |
maturin wheel | Build a wheel |
maturin develop --release | Build a Python package in development mode with optimizations |
maturin build --release | Build a Python package with optimizations |
maturin publish --username <username> --password <password> | Publish a Python package to PyPI |
maturin publish --username <username> --password <password> --repository-url <repository-url> | Publish a Python package to a custom PyPI repository |
Python extensions
Using Rust extension in Python is not the only way to speed up Python code or if you need to integrate with C/C++ code. In this section we will look at some of them. We will also look at some of the tools that can be used.
Cython
Cython is a superset of the programming language Python, which allows developers to write Python code (with optional, C-inspired syntax extensions) that yields performance comparable to that of C.
Numba
Numba is an open source JIT compiler that translates a subset of Python and NumPy code into fast machine code.
PyPy
PyPy is a drop-in replacement for the stock Python interpreter, CPython. Whereas CPython compiles Python to intermediate bytecode that is then interpreted by a virtual machine, PyPy uses just-in-time (JIT) compilation to translate Python code into machine-native assembly language.
ctypes
ctypes is a foreign function library for Python. It provides C compatible data types, and allows calling functions in DLLs or shared libraries. It can be used to wrap these libraries in pure Python.
cffi
C Foreign Function Interface for Python. Interact with almost any C code from Python, based on C-like declarations that you can often copy-paste from header files or documentation.